NOTE SPACE
STORES EXPERIMENT AND TRICK NOTES ABOUT COMPUTER GRAPHIC
ThreeJS
GLSL
11-12-23
3D fire effect in ThreeJS
This note’s inspired from the video Procedural Cartoon Flames in Blender.
It’s a Blender tutorial video explaining how to create a 3D animated fire effect.
It inspired me to do the experiment if I can also do it in ThreeJS.
So, In this article, I will show you the experiment result and how to do it.
For the code in this note, you can check it out at github.com/note-space-demo/3d-fire-effect-in-threejs.
This note use ThreeJS version 157
Set up scene
The first step is to create a 3D model that will be modified later. So, I created a fire shape model with high surface division and exported it as a glTF file.
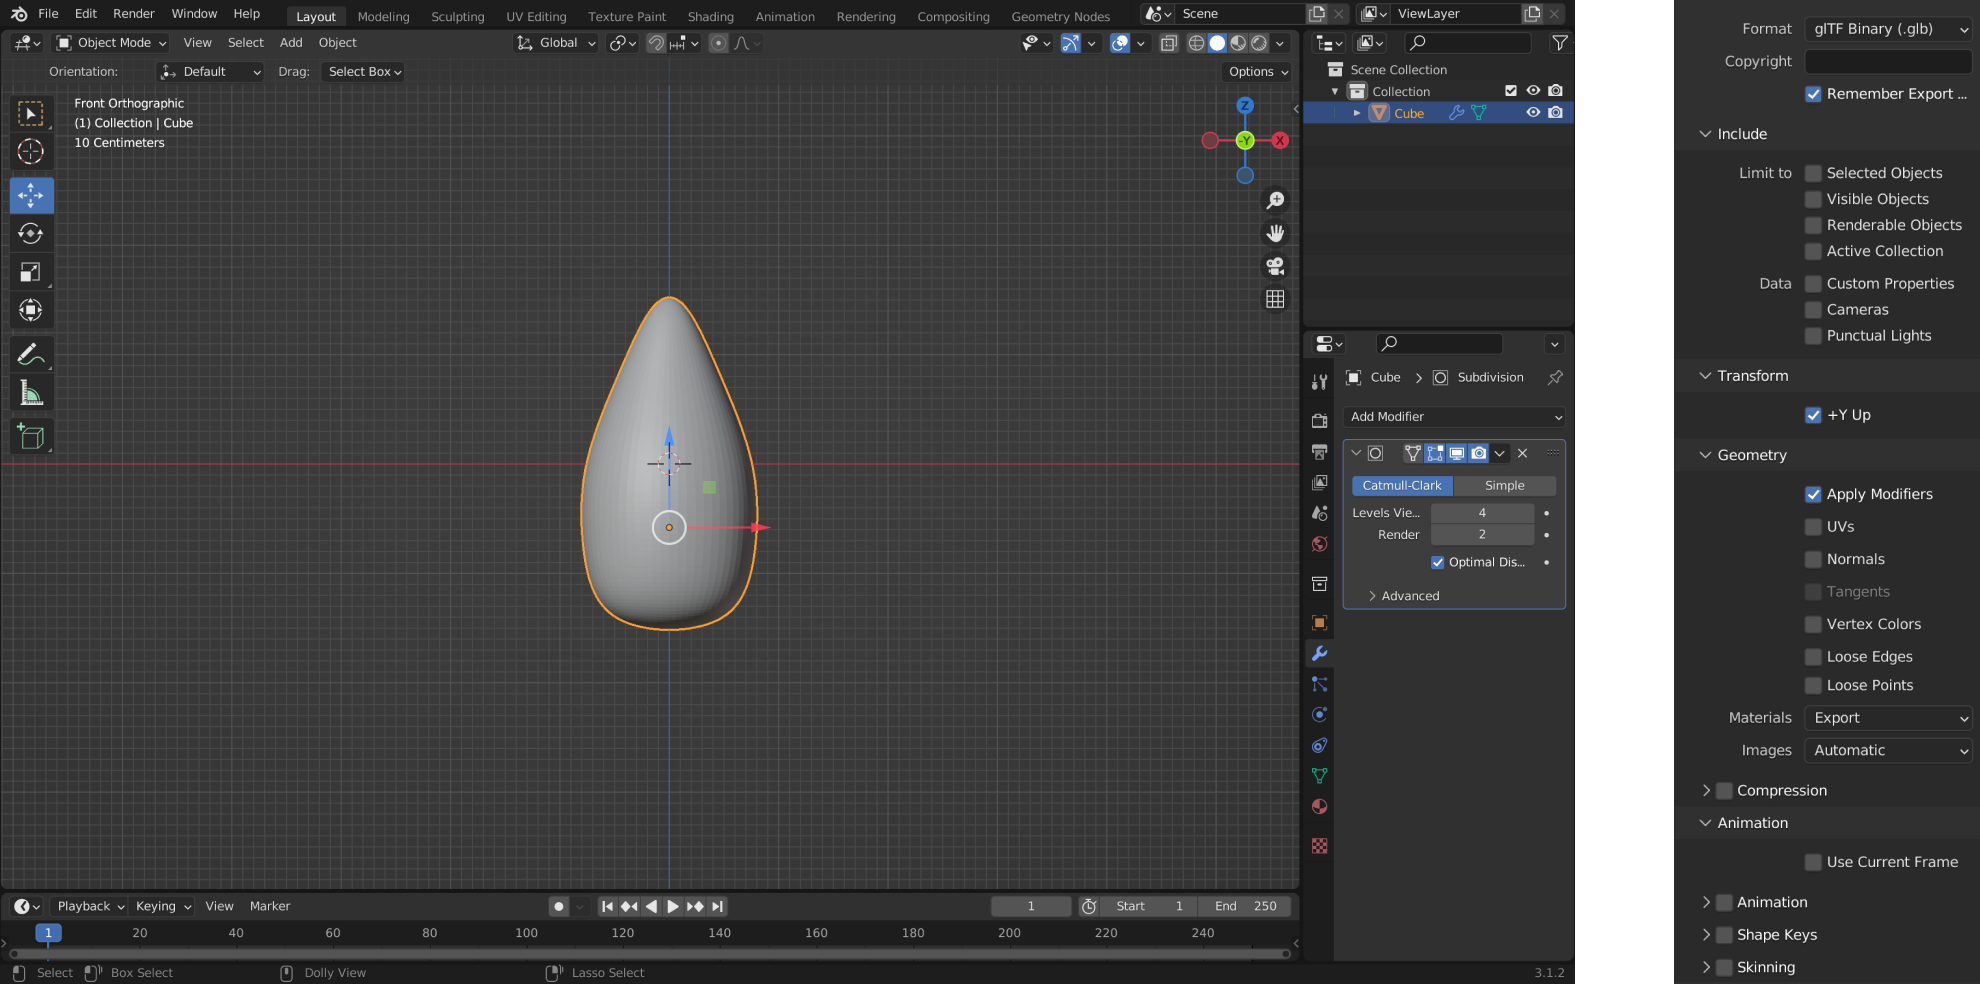
Model and export options
After that, let’s set up basic ThreeJS project like this.
<!DOCTYPE html>
<html lang="en">
  <head>
    <meta charset="UTF-8" />
    <meta name="viewport" content="width=device-width, initial-scale=1.0" />
    <title>3D fire effect in threejs</title>
  </head>
  <style>
    body {
      padding: 0px;
      margin: 0px;
    }
  </style>

  <body>
    <script type="importmap">
      {
        "imports": {
          "three": "https://unpkg.com/[email protected]/build/three.module.js",
          "three/addons/": "https://unpkg.com/[email protected]/examples/jsm/"
        }
      }
    </script>
    <script type="module">
      // Main Javascript
      import * as THREE from 'three'
      import { OrbitControls } from 'three/addons/controls/OrbitControls.js'
      import { GLTFLoader } from 'three/addons/loaders/GLTFLoader.js'

      const scene = new THREE.Scene()
      const width = window.innerWidth
      const height = window.innerHeight
      const camera = new THREE.PerspectiveCamera(75, width / height, 0.1, 1000)
      camera.position.z = 3
      const renderer = new THREE.WebGLRenderer()
      renderer.setSize(width, height)
      renderer.pixelRatio = window.devicePixelRatio ?? renderer.pixelRatio
      const controls = new OrbitControls(camera, renderer.domElement)

      document.body.appendChild(renderer.domElement)

      const material = new THREE.MeshBasicMaterial({ color: 'red' })

      const loader = new GLTFLoader()

      // import model and add to scene
      loader.load(
        '/fire-template.glb',
        function (gltf) {
          const { geometry } = gltf.scene.children[0]
          const mesh = new THREE.Mesh(geometry, material)
          mesh.position.y = -0.55

          scene.add(mesh)
        },
        undefined,
        console.error
      )

      function render() {
        controls.update()
        renderer.render(scene, camera)
        window.requestAnimationFrame(render)
      }

      render()
    </script>
  </body>
</html>
Serve this file and model on server. For me, I use serve command from npm here.
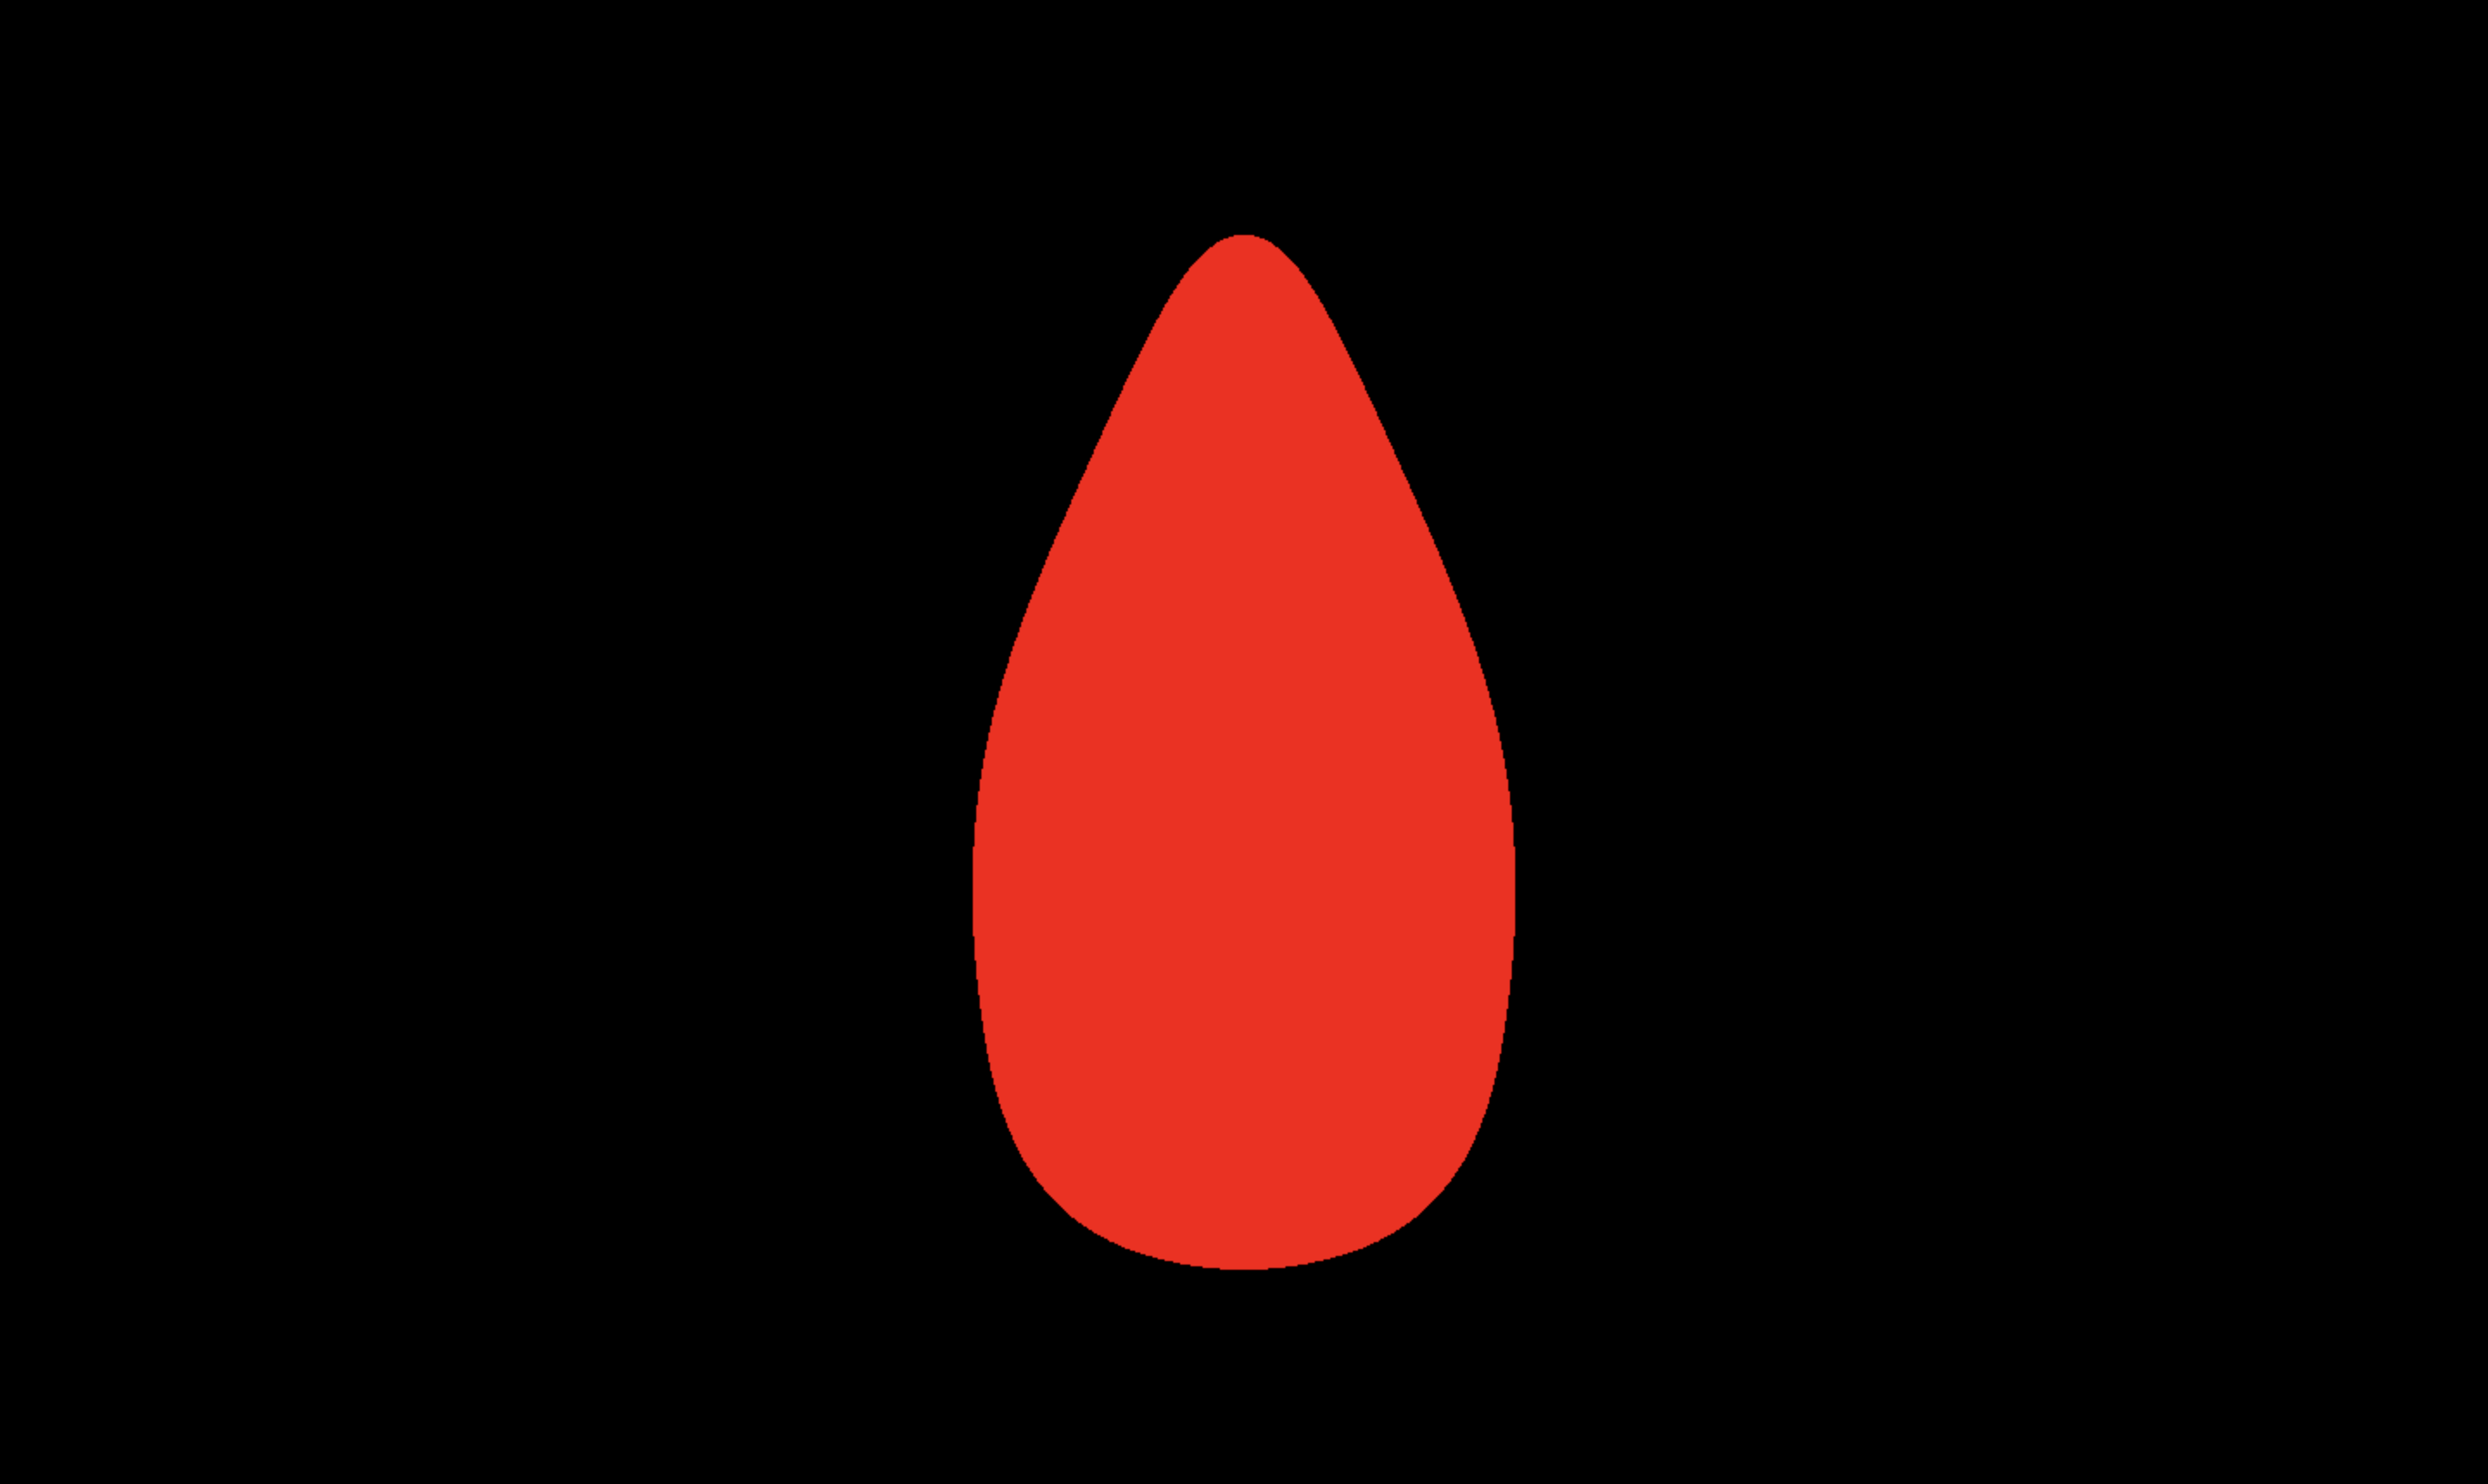
Set up result
Now, you are ready for the next step.
Flame pattern
In this step, I will explain the concept of how to create fire pattern in shader first.
So, let’s start with flame ripple pattern.
I want you to look at the video below first.
voronoi ramping demo
The video simulates how Voronoi ramping works. The left is just Voronoi noise visualized on plain geometry.
The center is a geometry applied voronoi offset to its vertices position vertically.
And, the last is just like the center but applied with 2 averaged-together Voronoi noise offsets with different random seeds and cell sizes.
Then, I move 2 plan geometry to the middle of them. The remaining part of plain geometry (black part) visualizes a flam ripple pattern.
Now, let’s implement the same concept with GLSL and apply it to our model. Start with creating voronoi noise pattern on model.
<script type="x-shader/x-vertex" id="vertex-shader">
  // vertex shader
  precision mediump float;

  void main()
  {
      gl_Position = projectionMatrix * viewMatrix * modelMatrix * vec4(position, 1.0);
  }
</script>
<script type="x-shader/x-fragment" id="fragment-shader">
  // fragment shader
  precision mediump float;

  out vec4 fragColor;

  float random(in vec2 _st) {
    return fract(sin(dot(_st.xy, vec2(12.9898,78.233))) * 43758.5453123);
  }

  float wrap(float value){
    if(value >= 1.){
      return mod(value, 1.);
    }

    if(value < 0.){
        return 1. - mod(value * -1., 1.);
    }
    return value;
  }

  vec2 wrap(vec2 value){
    return vec2(wrap(value.x), wrap(value.y));
  }


  float voronoi(vec2 position, vec2 cellNumber){
    vec2 cellSize = 1. / cellNumber;
    vec2 cellPosition = floor(position / cellSize) * cellSize + cellSize / 2.;

    float maxDistance = distance(vec2(0.), cellSize);
    float minDistance = maxDistance;
    for(float offsetX = -1.; offsetX < 2.; offsetX++){
      for(float offsetY = -1.; offsetY < 2.; offsetY++){
        vec2 currentCellPosition = cellPosition + vec2(offsetX, offsetY) * cellSize;
        vec2 wrapCellPosition = wrap(currentCellPosition);
        vec2 offsettedCurrentCellPosition = currentCellPosition + (random(wrapCellPosition) * 2. - 1.)  * cellSize / 2.;
        float currentDistance = distance(position, offsettedCurrentCellPosition);
        if(minDistance > currentDistance){
            minDistance = currentDistance;
        }
      }
    }

    return minDistance / maxDistance;
  }

  void main()
  {
      float noise = voronoi(gl_FragCoord.xy / 1000., vec2(20.));
      fragColor = vec4(vec3(noise), 1);
  }
</script>
Create a basic vertex shader and fragment shader.
I call voronoi noise from code and suddenly use it as a result color channel value.
In this note, I won’t explain how the Voronoi noise code actually works.
You can read it by yourself at Voronoi in ThreeJS GLSL note.
But, I will brief the Voronoi noise interface.
The first variable is the position of Voronoi noise texture.
Its value is between [0, 0] to [1, 1].
And, the second is the number of cell columns and row numbers.
In this case, it’s 20 x 20 = 400 cells on the screen.
// Main Javascript
// ...
const fragShader = document.getElementById('fragment-shader').innerHTML
const vertexShader = document.getElementById('vertex-shader').innerHTML
const material = new THREE.ShaderMaterial({
  fragmentShader: fragShader,
  vertexShader: vertexShader,
  glslVersion: THREE.GLSL3,
})
Don’t forget to change the mesh basic material to shader material.
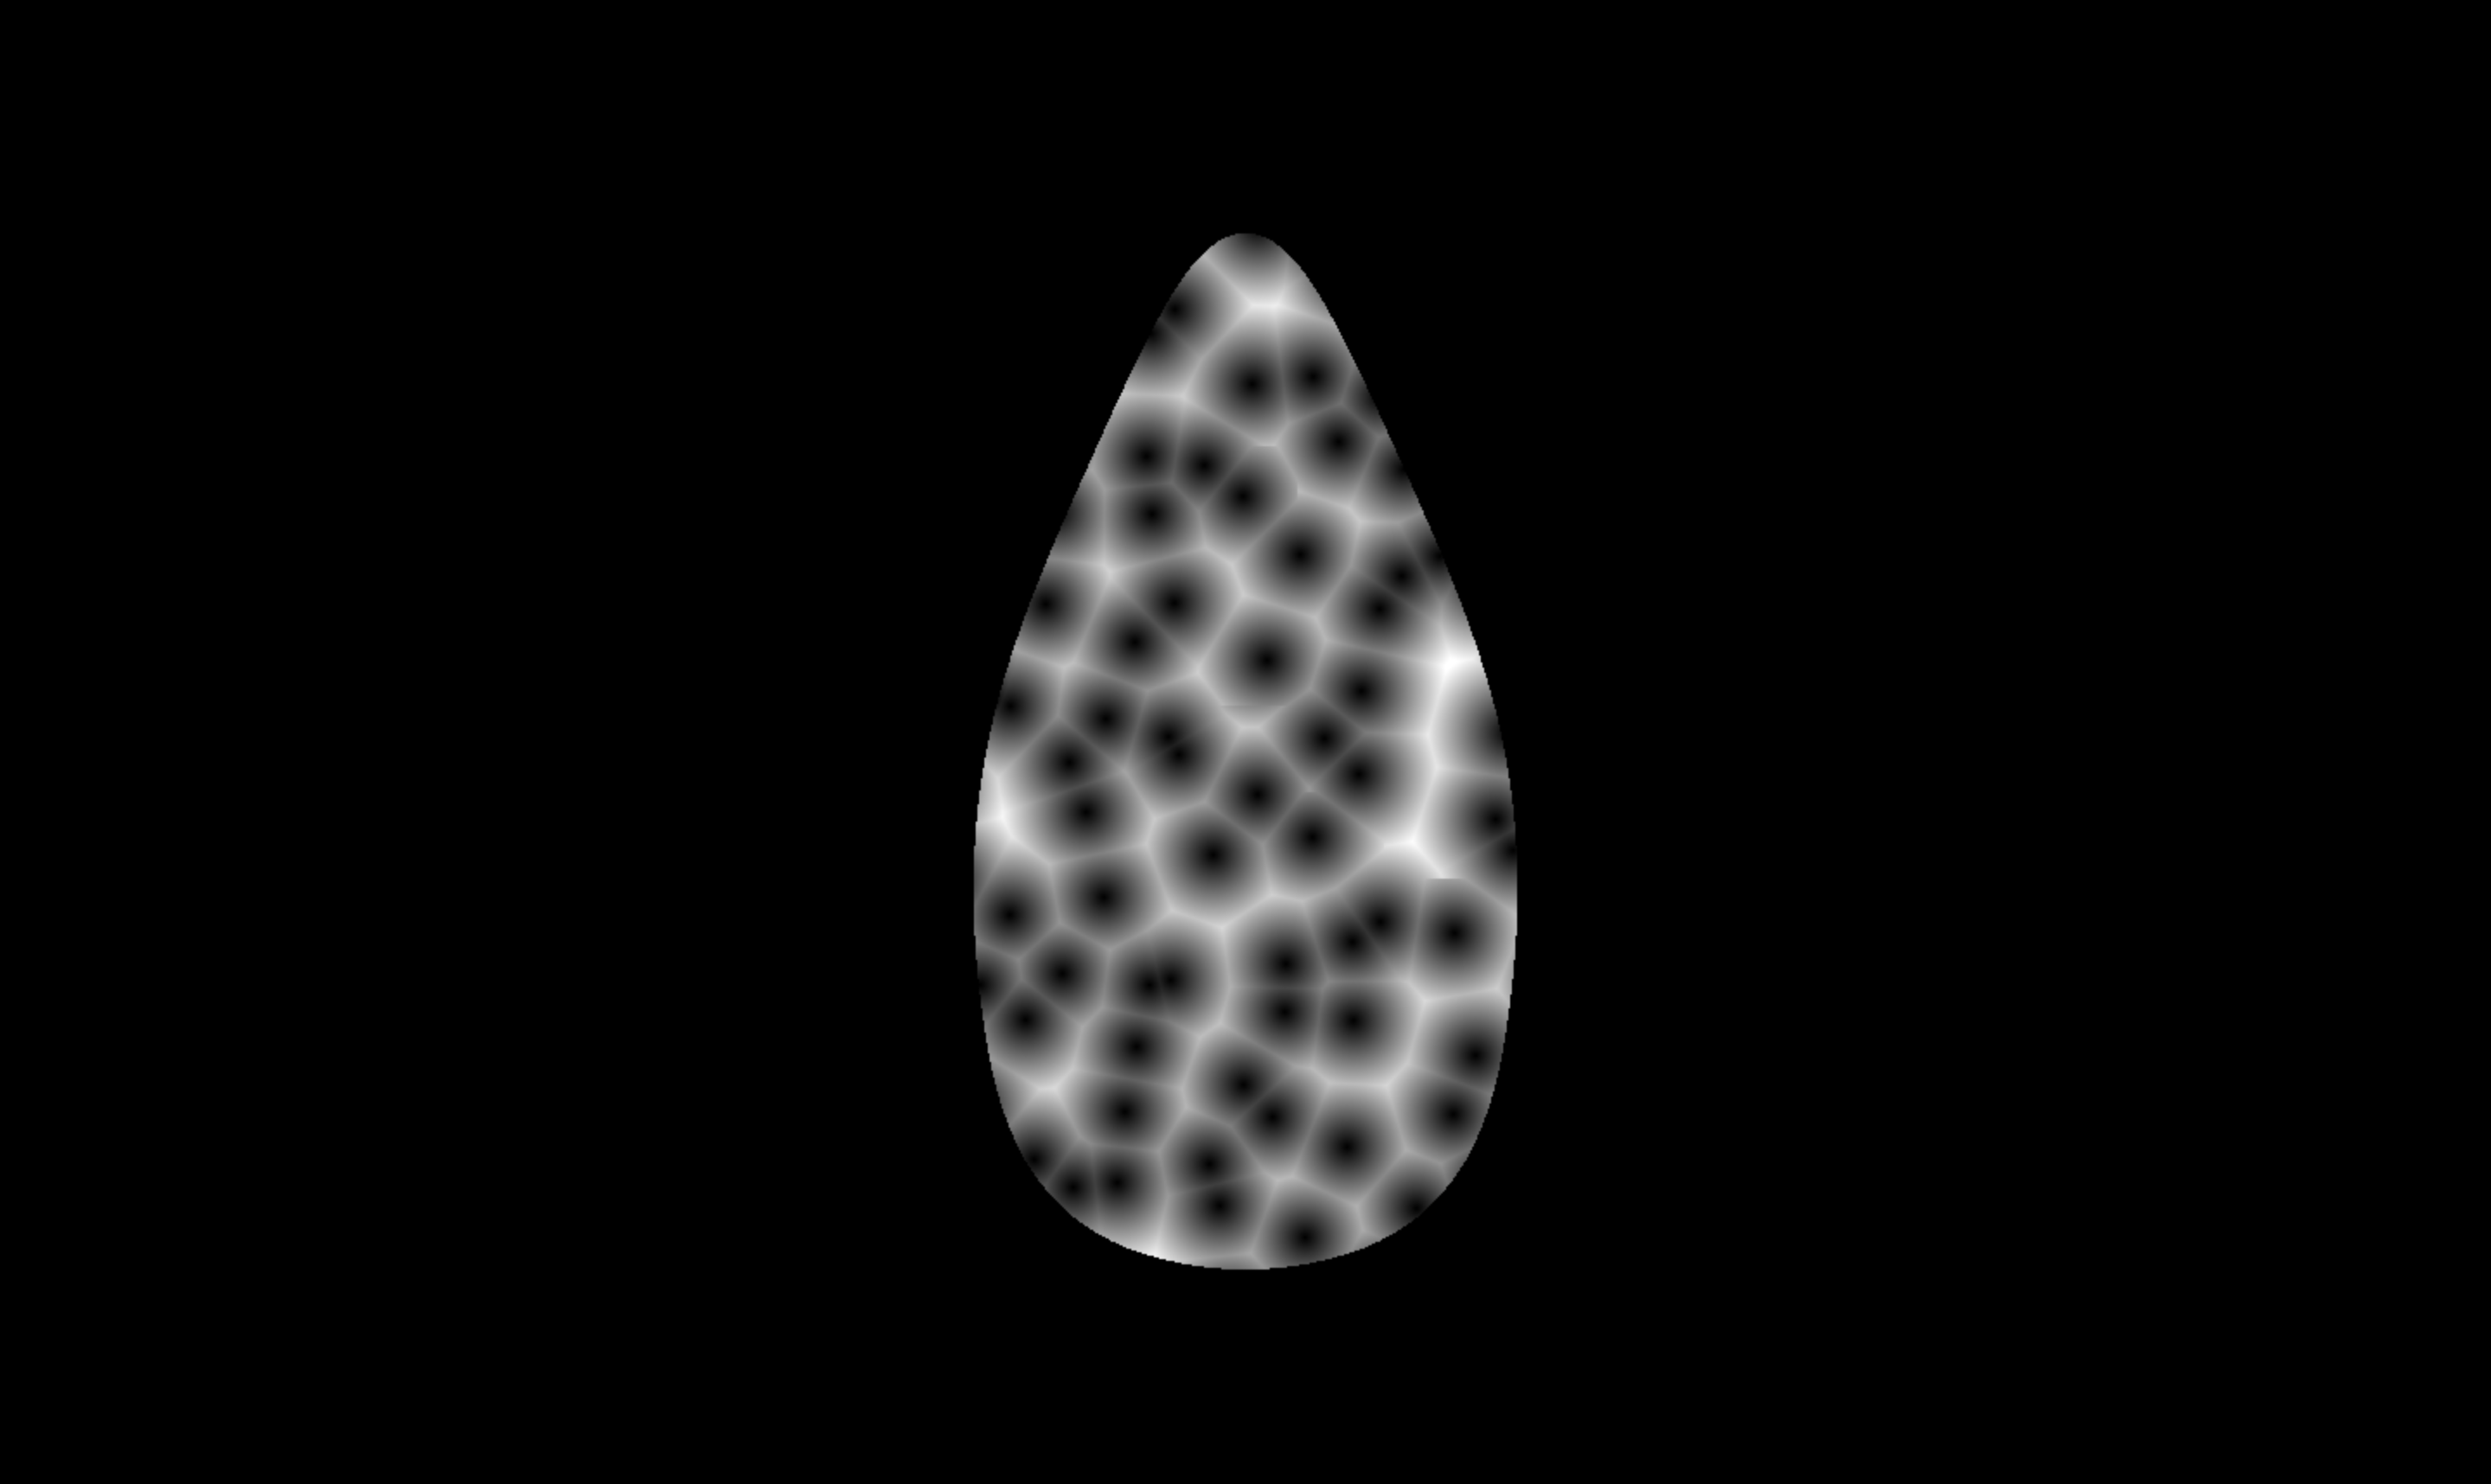
The rendering result
Next, try adding ramping logic with an if-else statement in the fragment shader.
// fragment shader
// ...
void main()
{
  float noise =  voronoi(gl_FragCoord.xy / 1000., vec2(20.));
  if(noise > 0.3){ // if condition act like a plain in the previous video
    fragColor = vec4(vec3(1), 1); //
  }else{
    fragColor = vec4(vec3(0), 1);
  }
}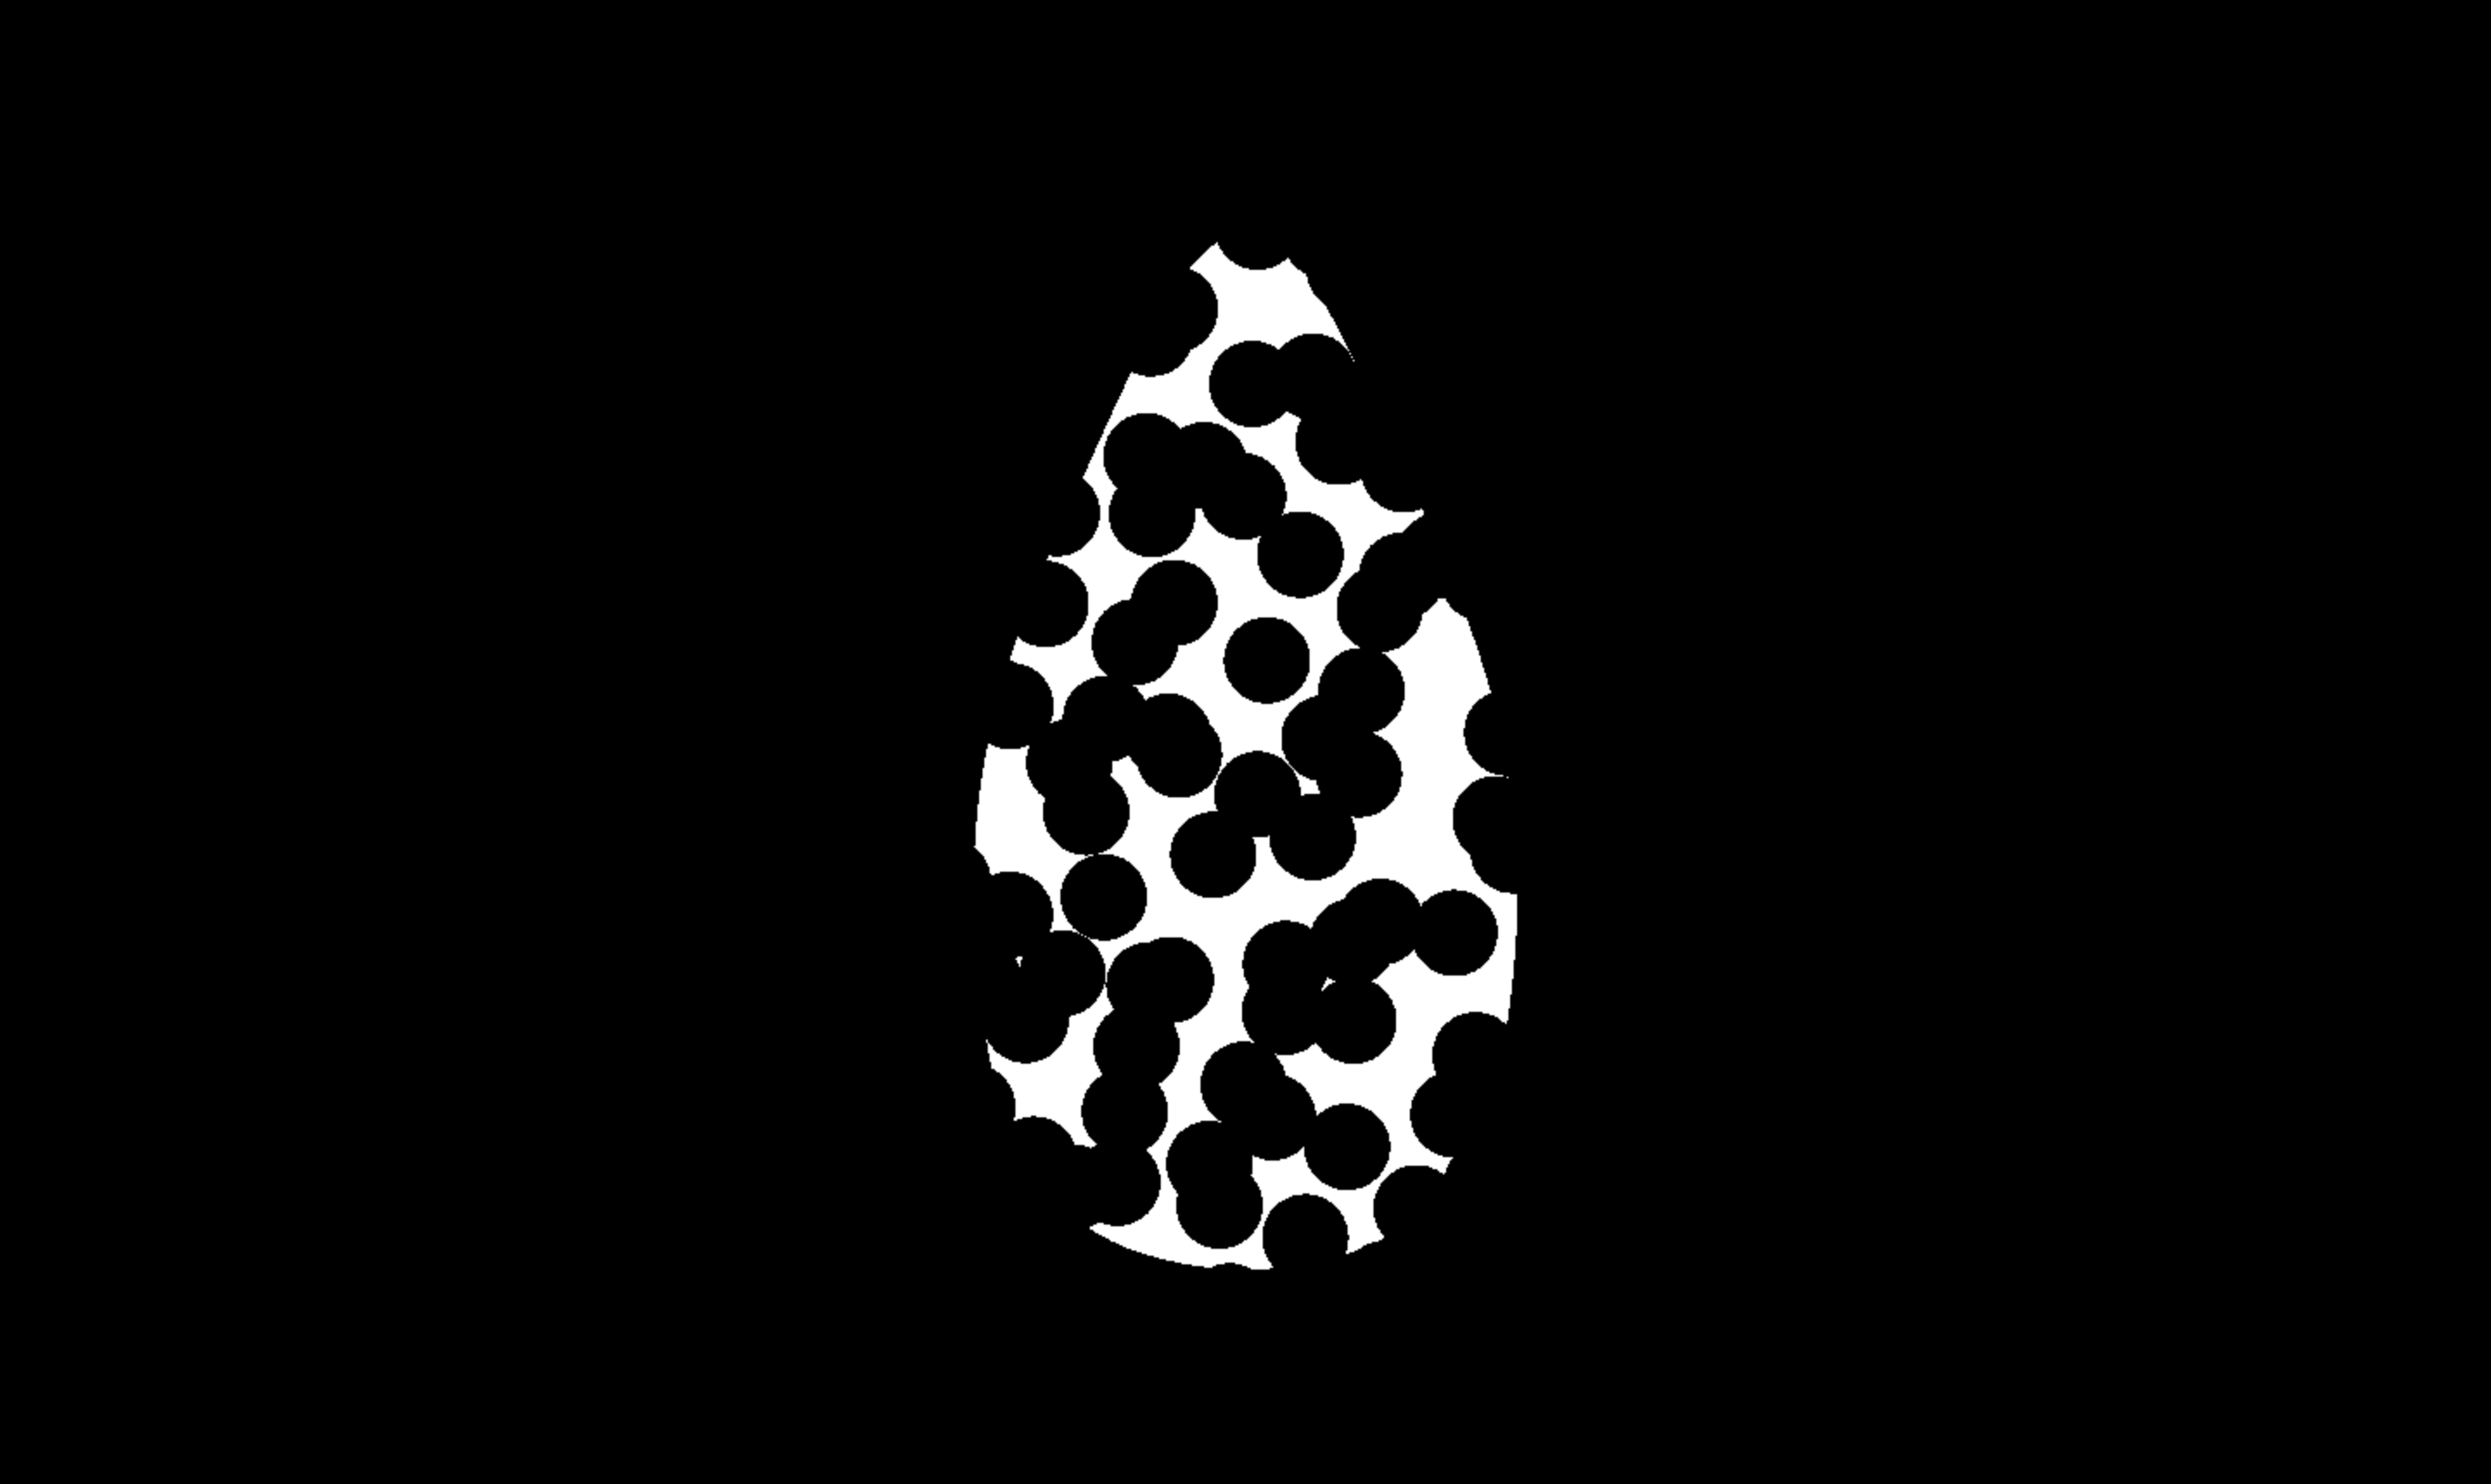
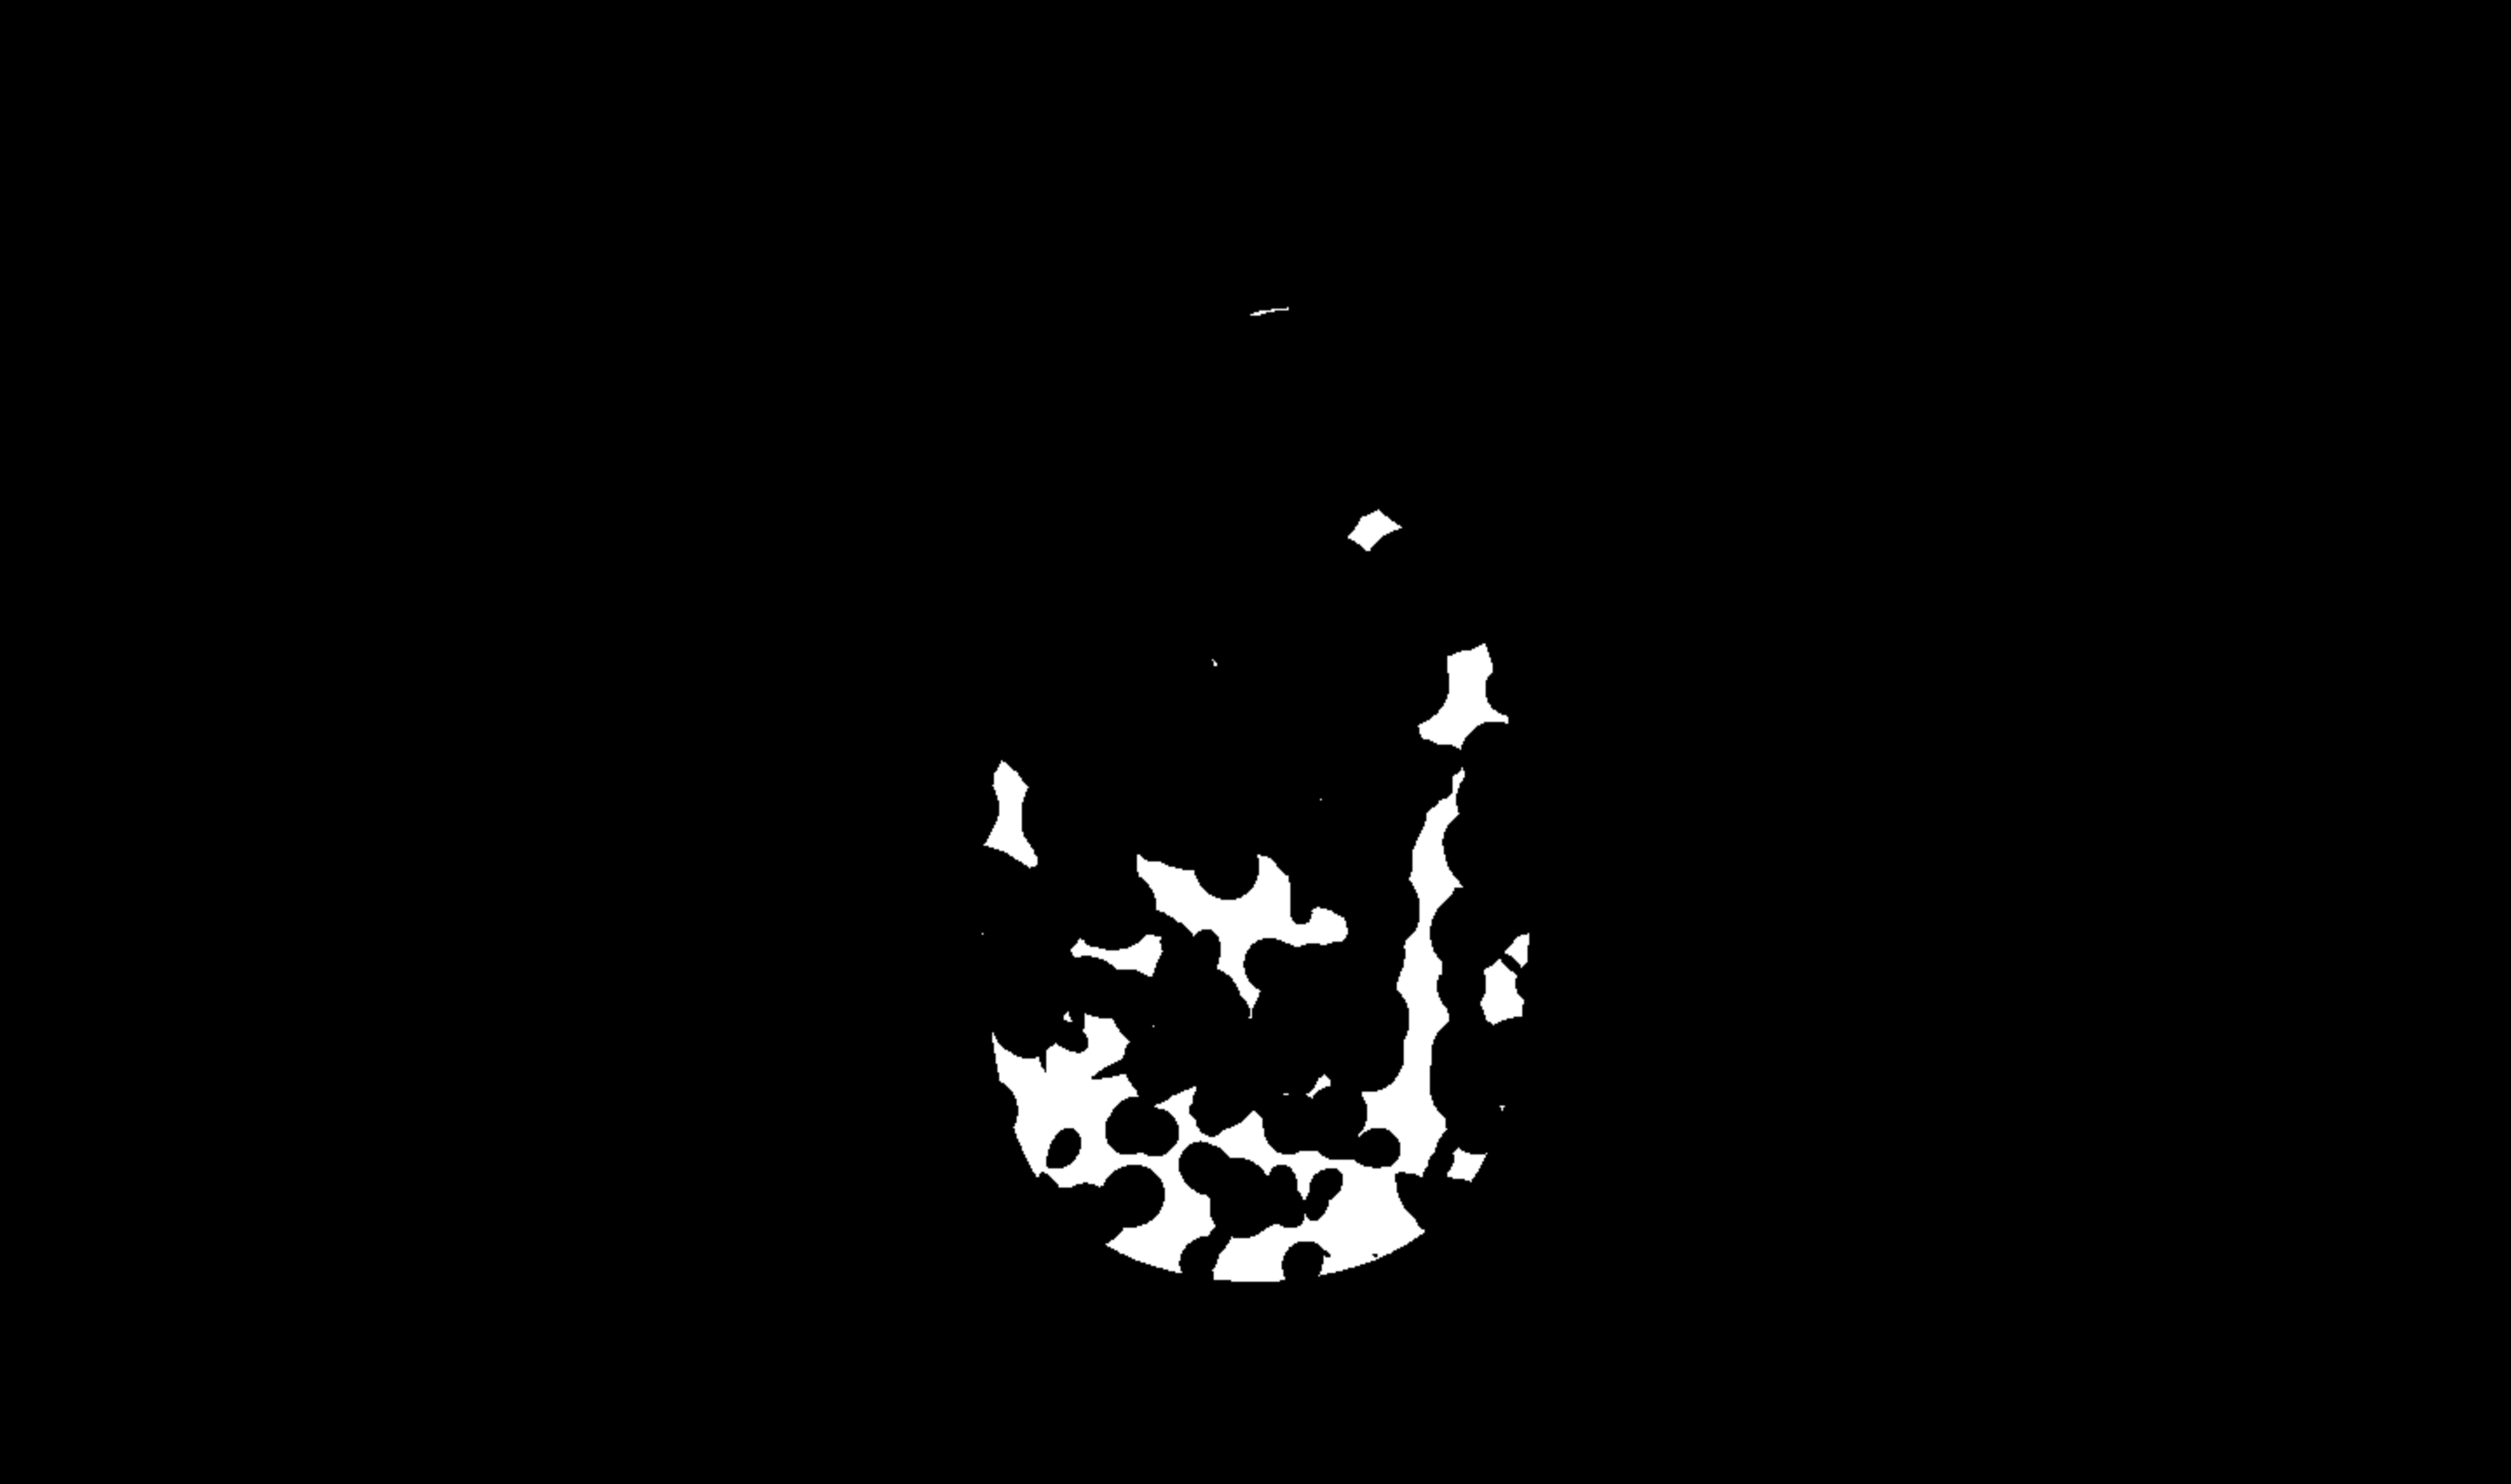
The rendering result
Now, blend voronoi noises with an average method.
// fragment shader
// ...
void main()
{
  float noise =  voronoi(gl_FragCoord.xy / 1000., vec2(20.));

  // add two more noise small one and big one
  float smallNoise =  voronoi((gl_FragCoord.xy + 100.) / 1000., vec2(30.));
  float bigNoise =  voronoi((gl_FragCoord.xy + 200.) / 1000., vec2(10.));

  // average the value before using it in condition
  if((noise + smallNoise + bigNoise) / 3. > 0.3){
    fragColor = vec4(vec3(1), 1);
  }else{
    fragColor = vec4(vec3(0), 1);
  }
}
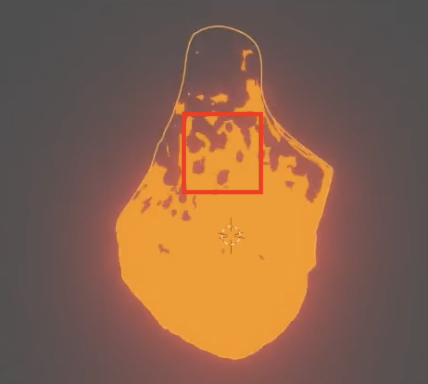
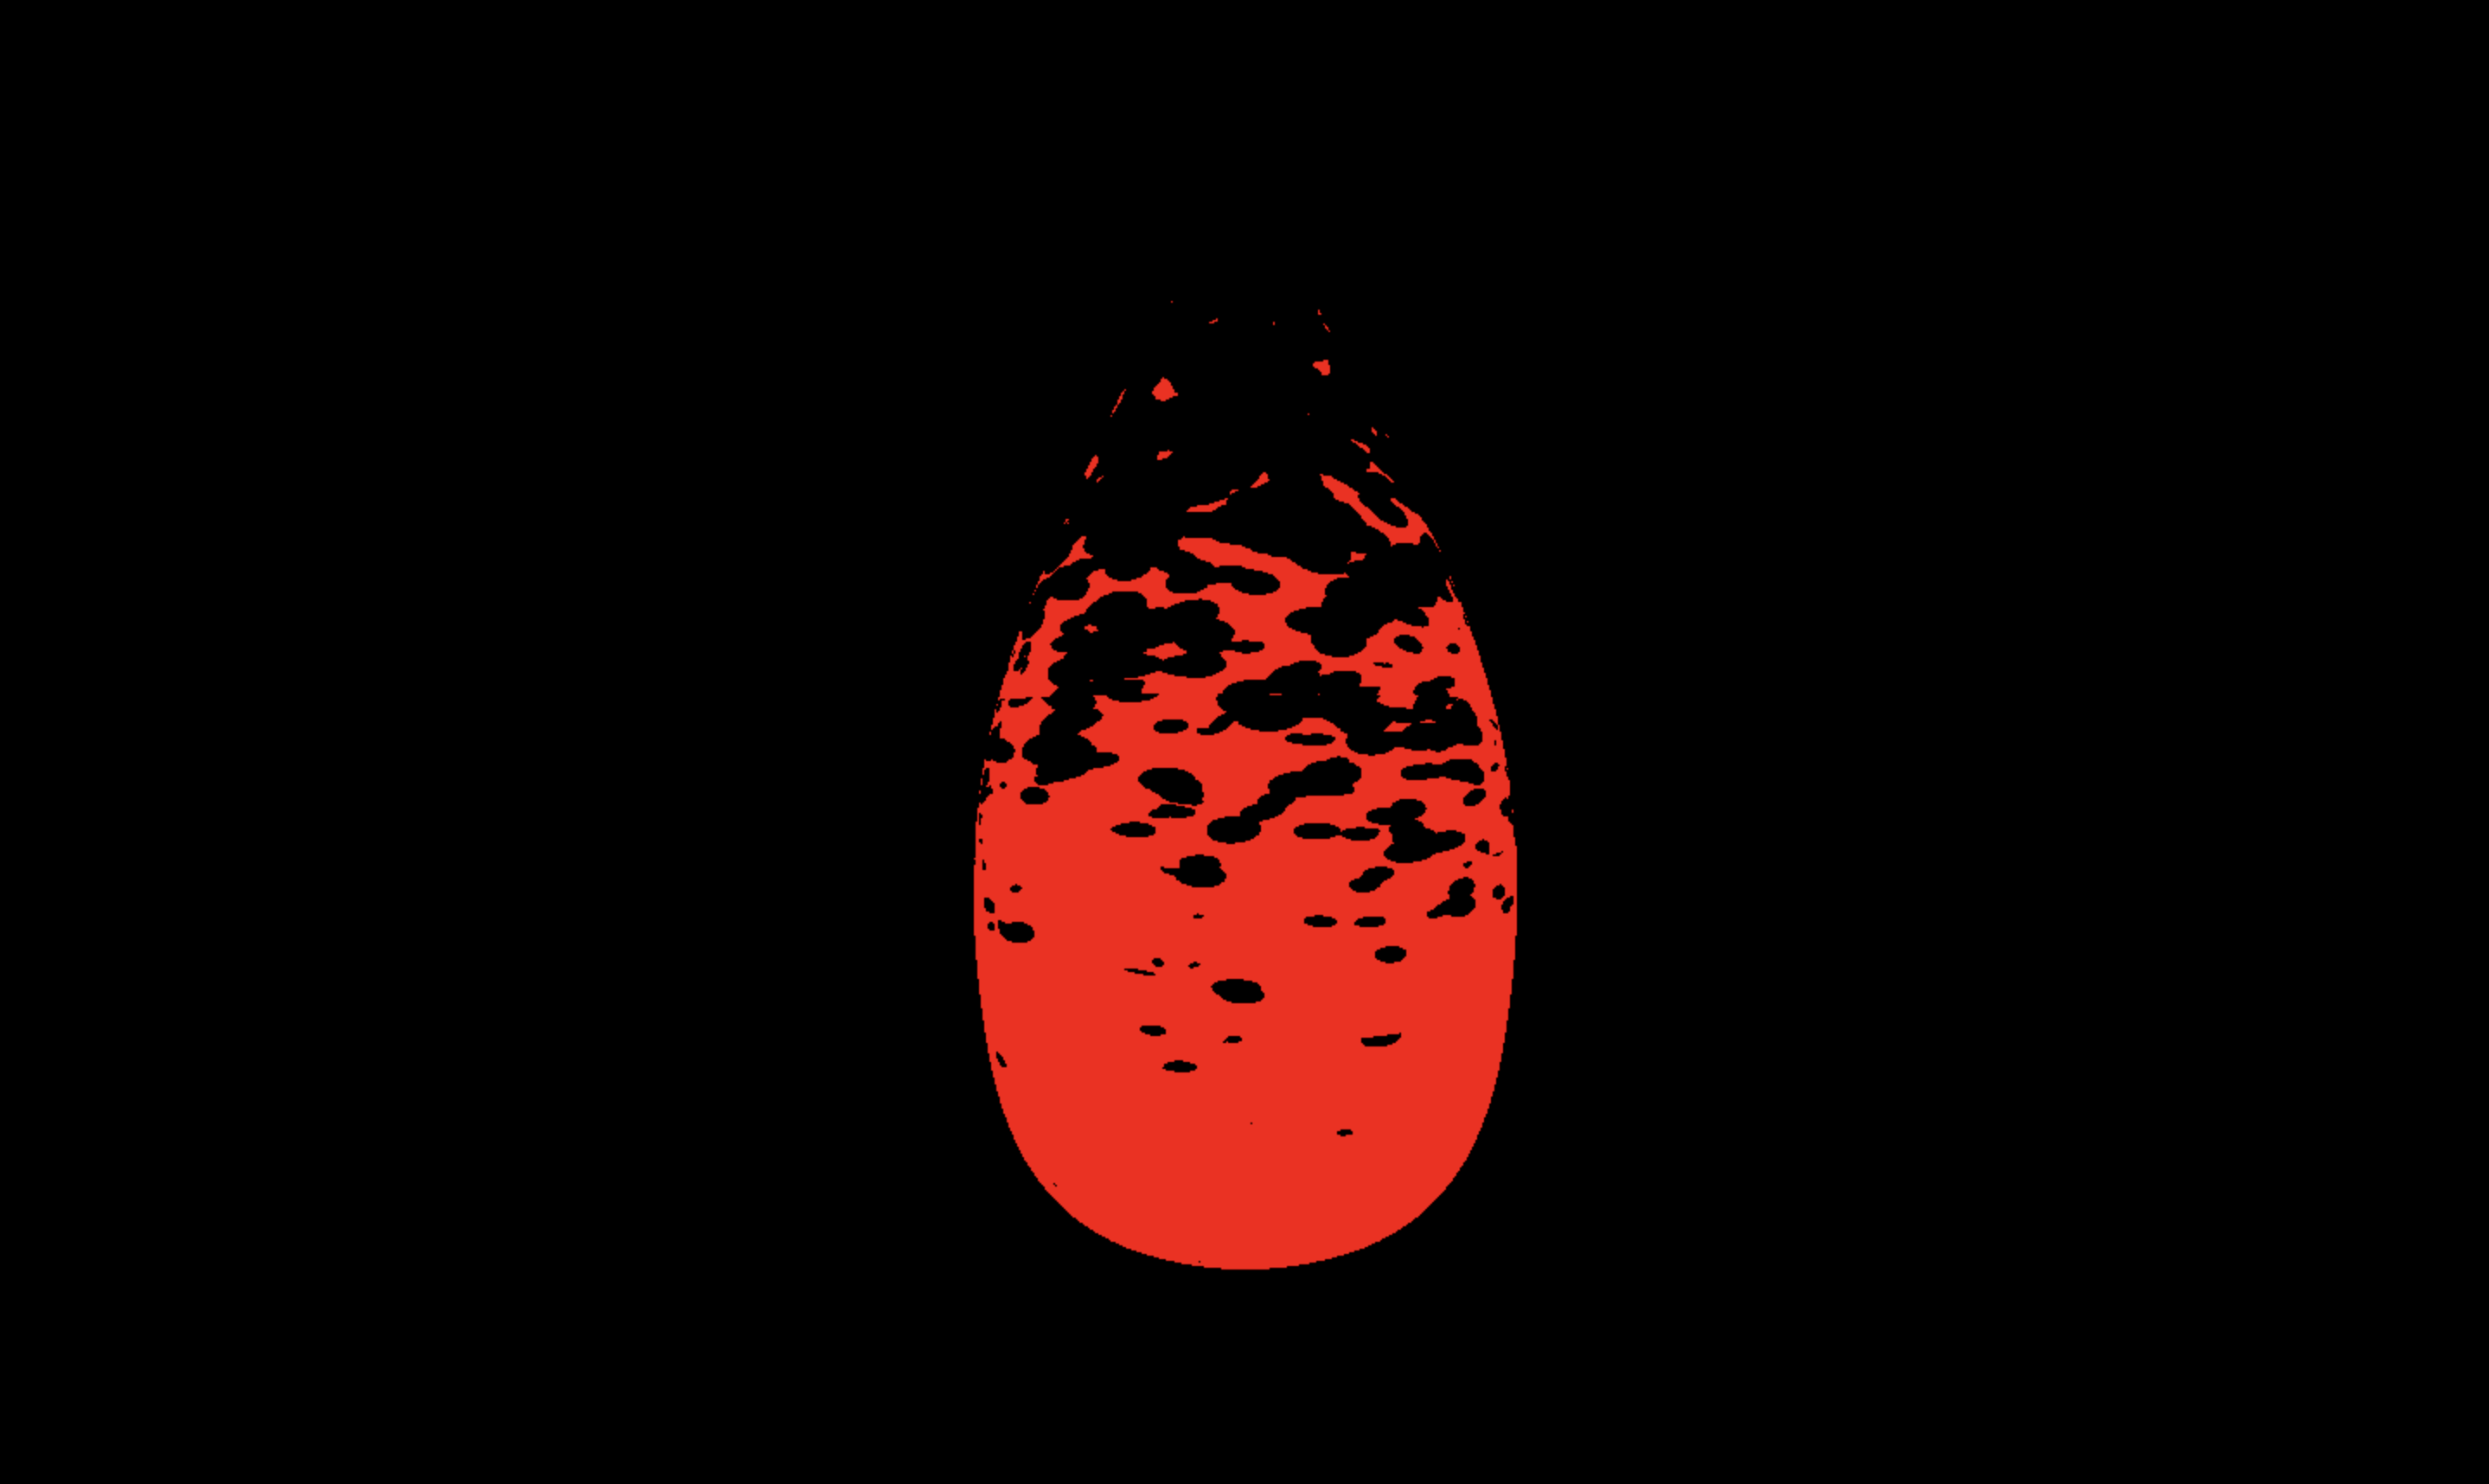
The rendering result with blending
Now, fire ripple is done. In the next step, we will fade it out.
To, fade out the fire we can use gradient value like this.
// vertex shader
precision mediump float;

out vec3 vPosition;

void main()
{
  gl_Position = projectionMatrix * viewMatrix * modelMatrix * vec4(position, 1.0);
  vPosition = position; // send position through varying
}
Get object position from vertex shader as varying.
//...
in vec3 vPosition; // receive varying
//...
void main()
{
float noise = voronoi(gl_FragCoord.xy / 1000., vec2(20.));
float smallNoise = voronoi((gl_FragCoord.xy + 100.) / 1000., vec2(30.));
float bigNoise = voronoi((gl_FragCoord.xy + 200.) / 1000., vec2(10.));
// add gradient value bases on vertical position location
float verticalGradient = -1. * vPosition.y * 0.5 + 0.5;
// add gradient a offset value to influent the noise value.
if((noise + smallNoise + bigNoise + verticalGradient) / 4. > 0.3){
fragColor = vec4(vec3(1), 1);
}else{
fragColor = vec4(vec3(0), 1);
}
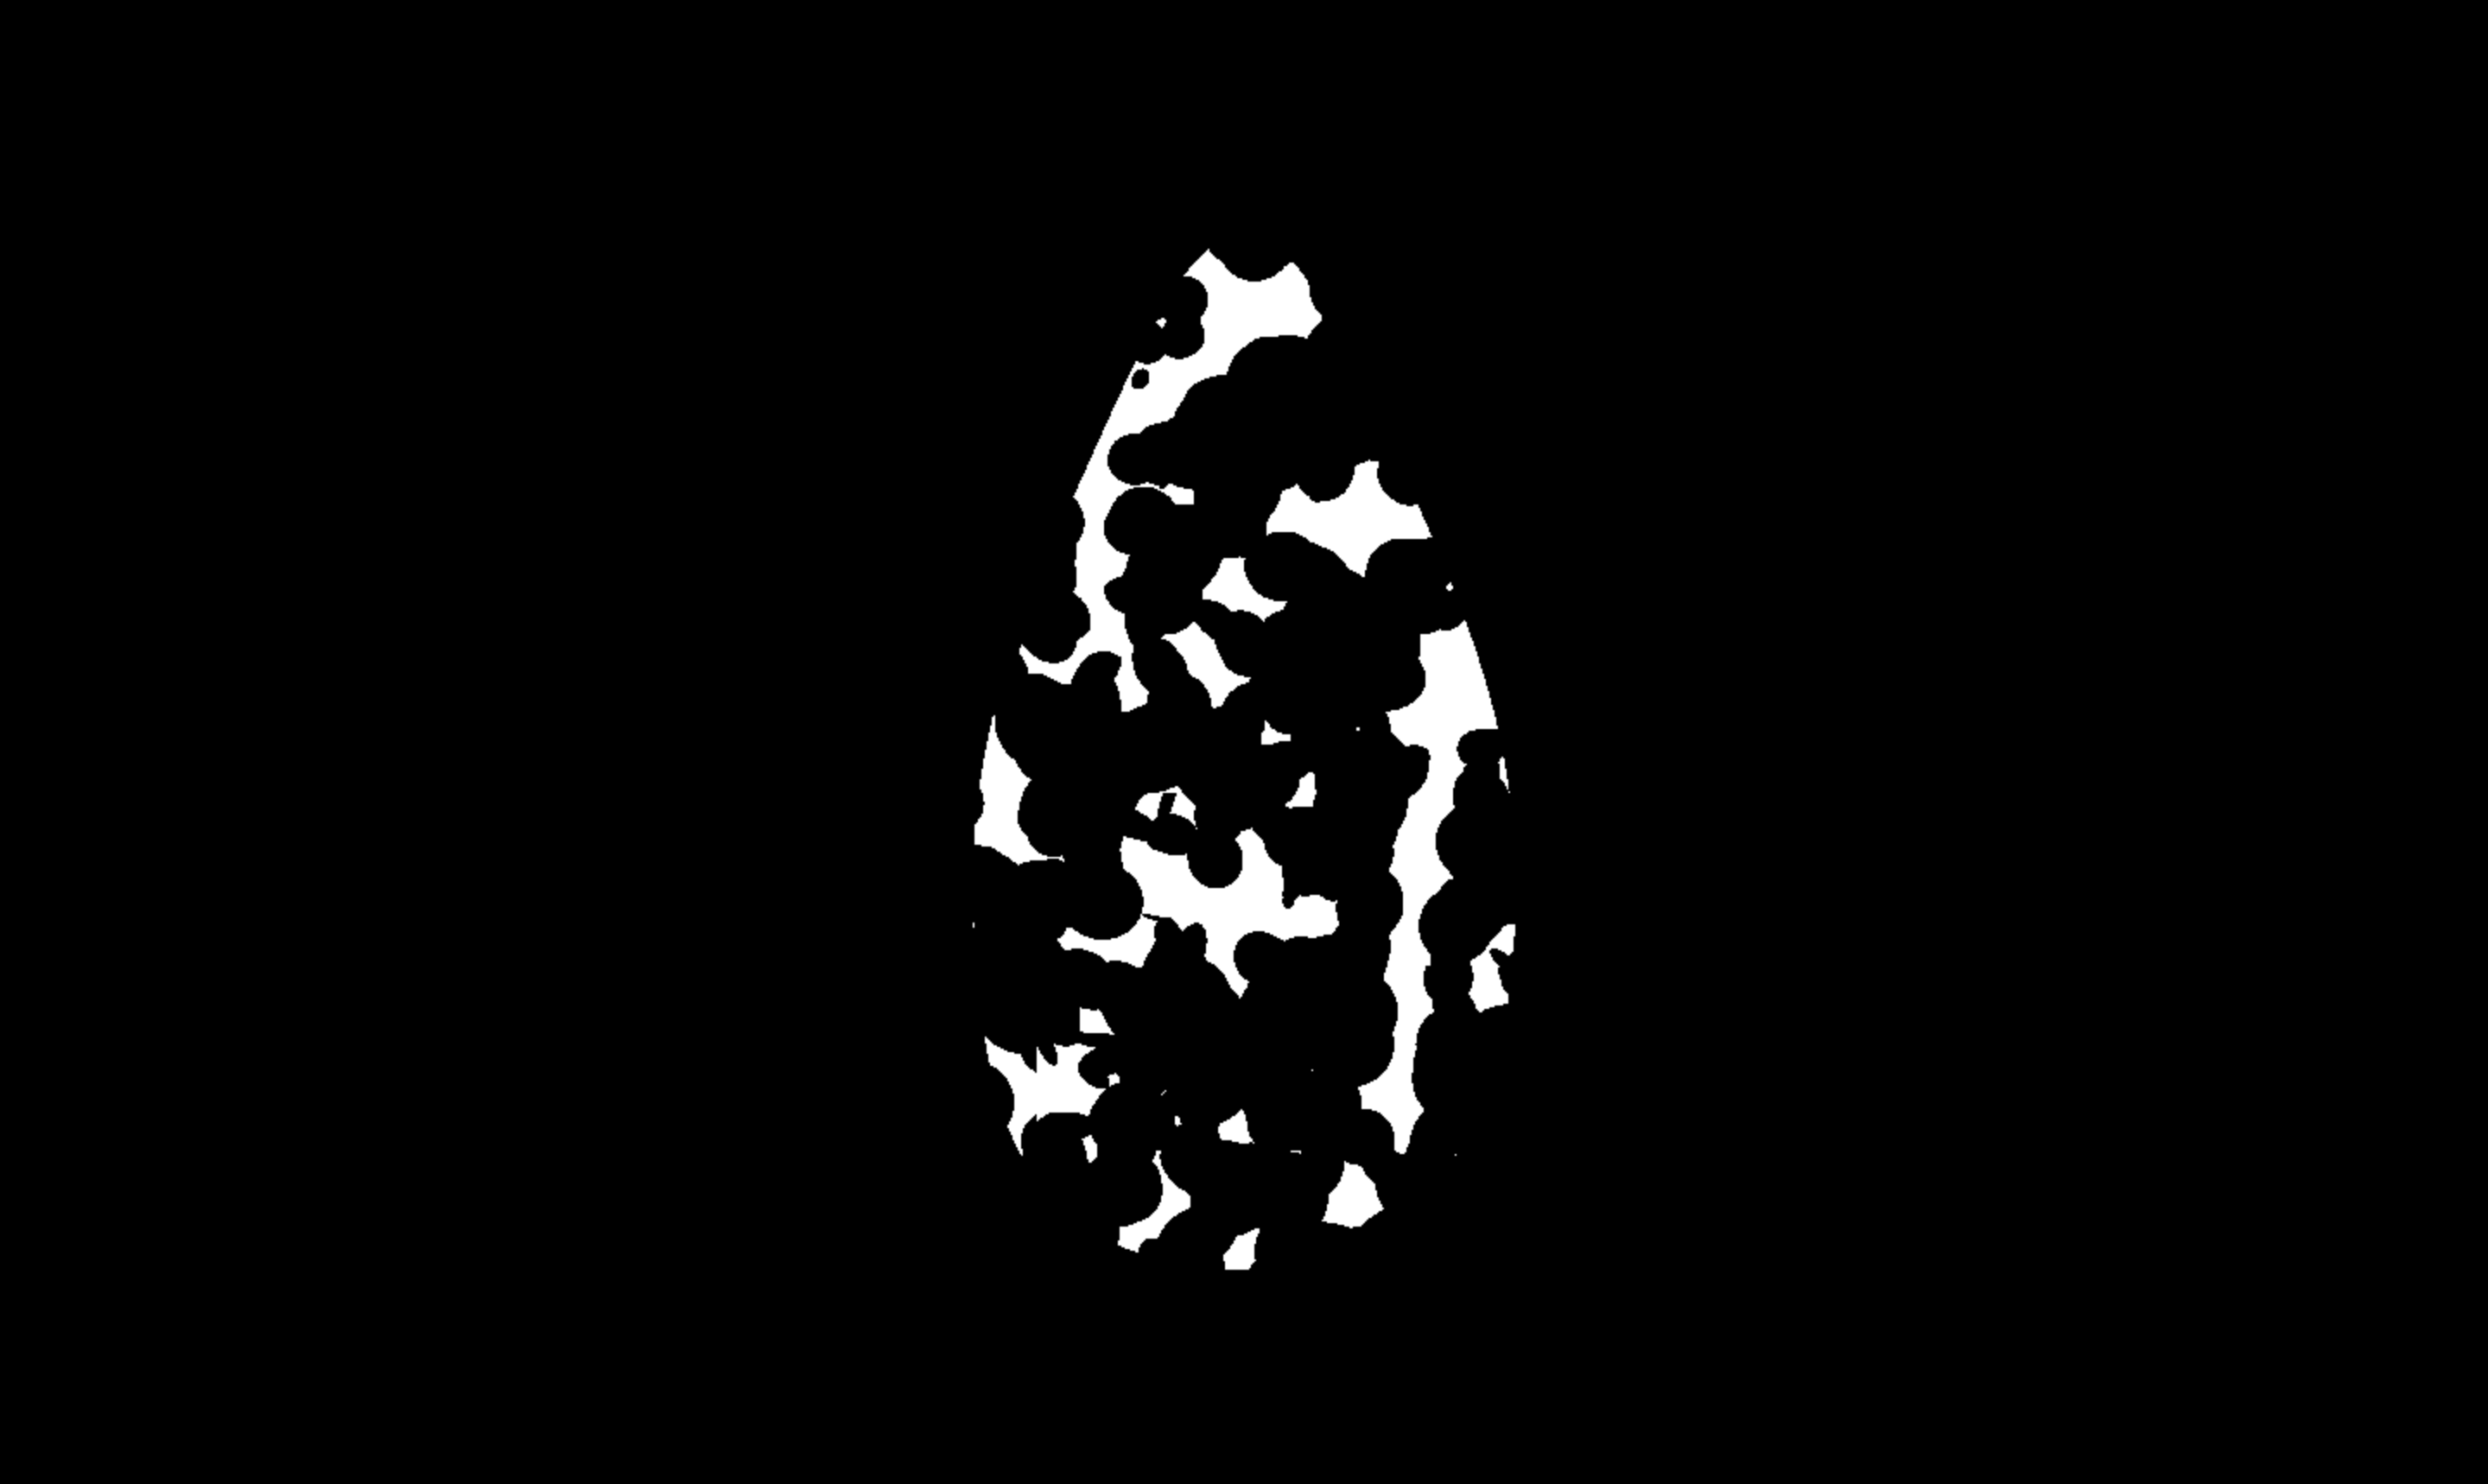
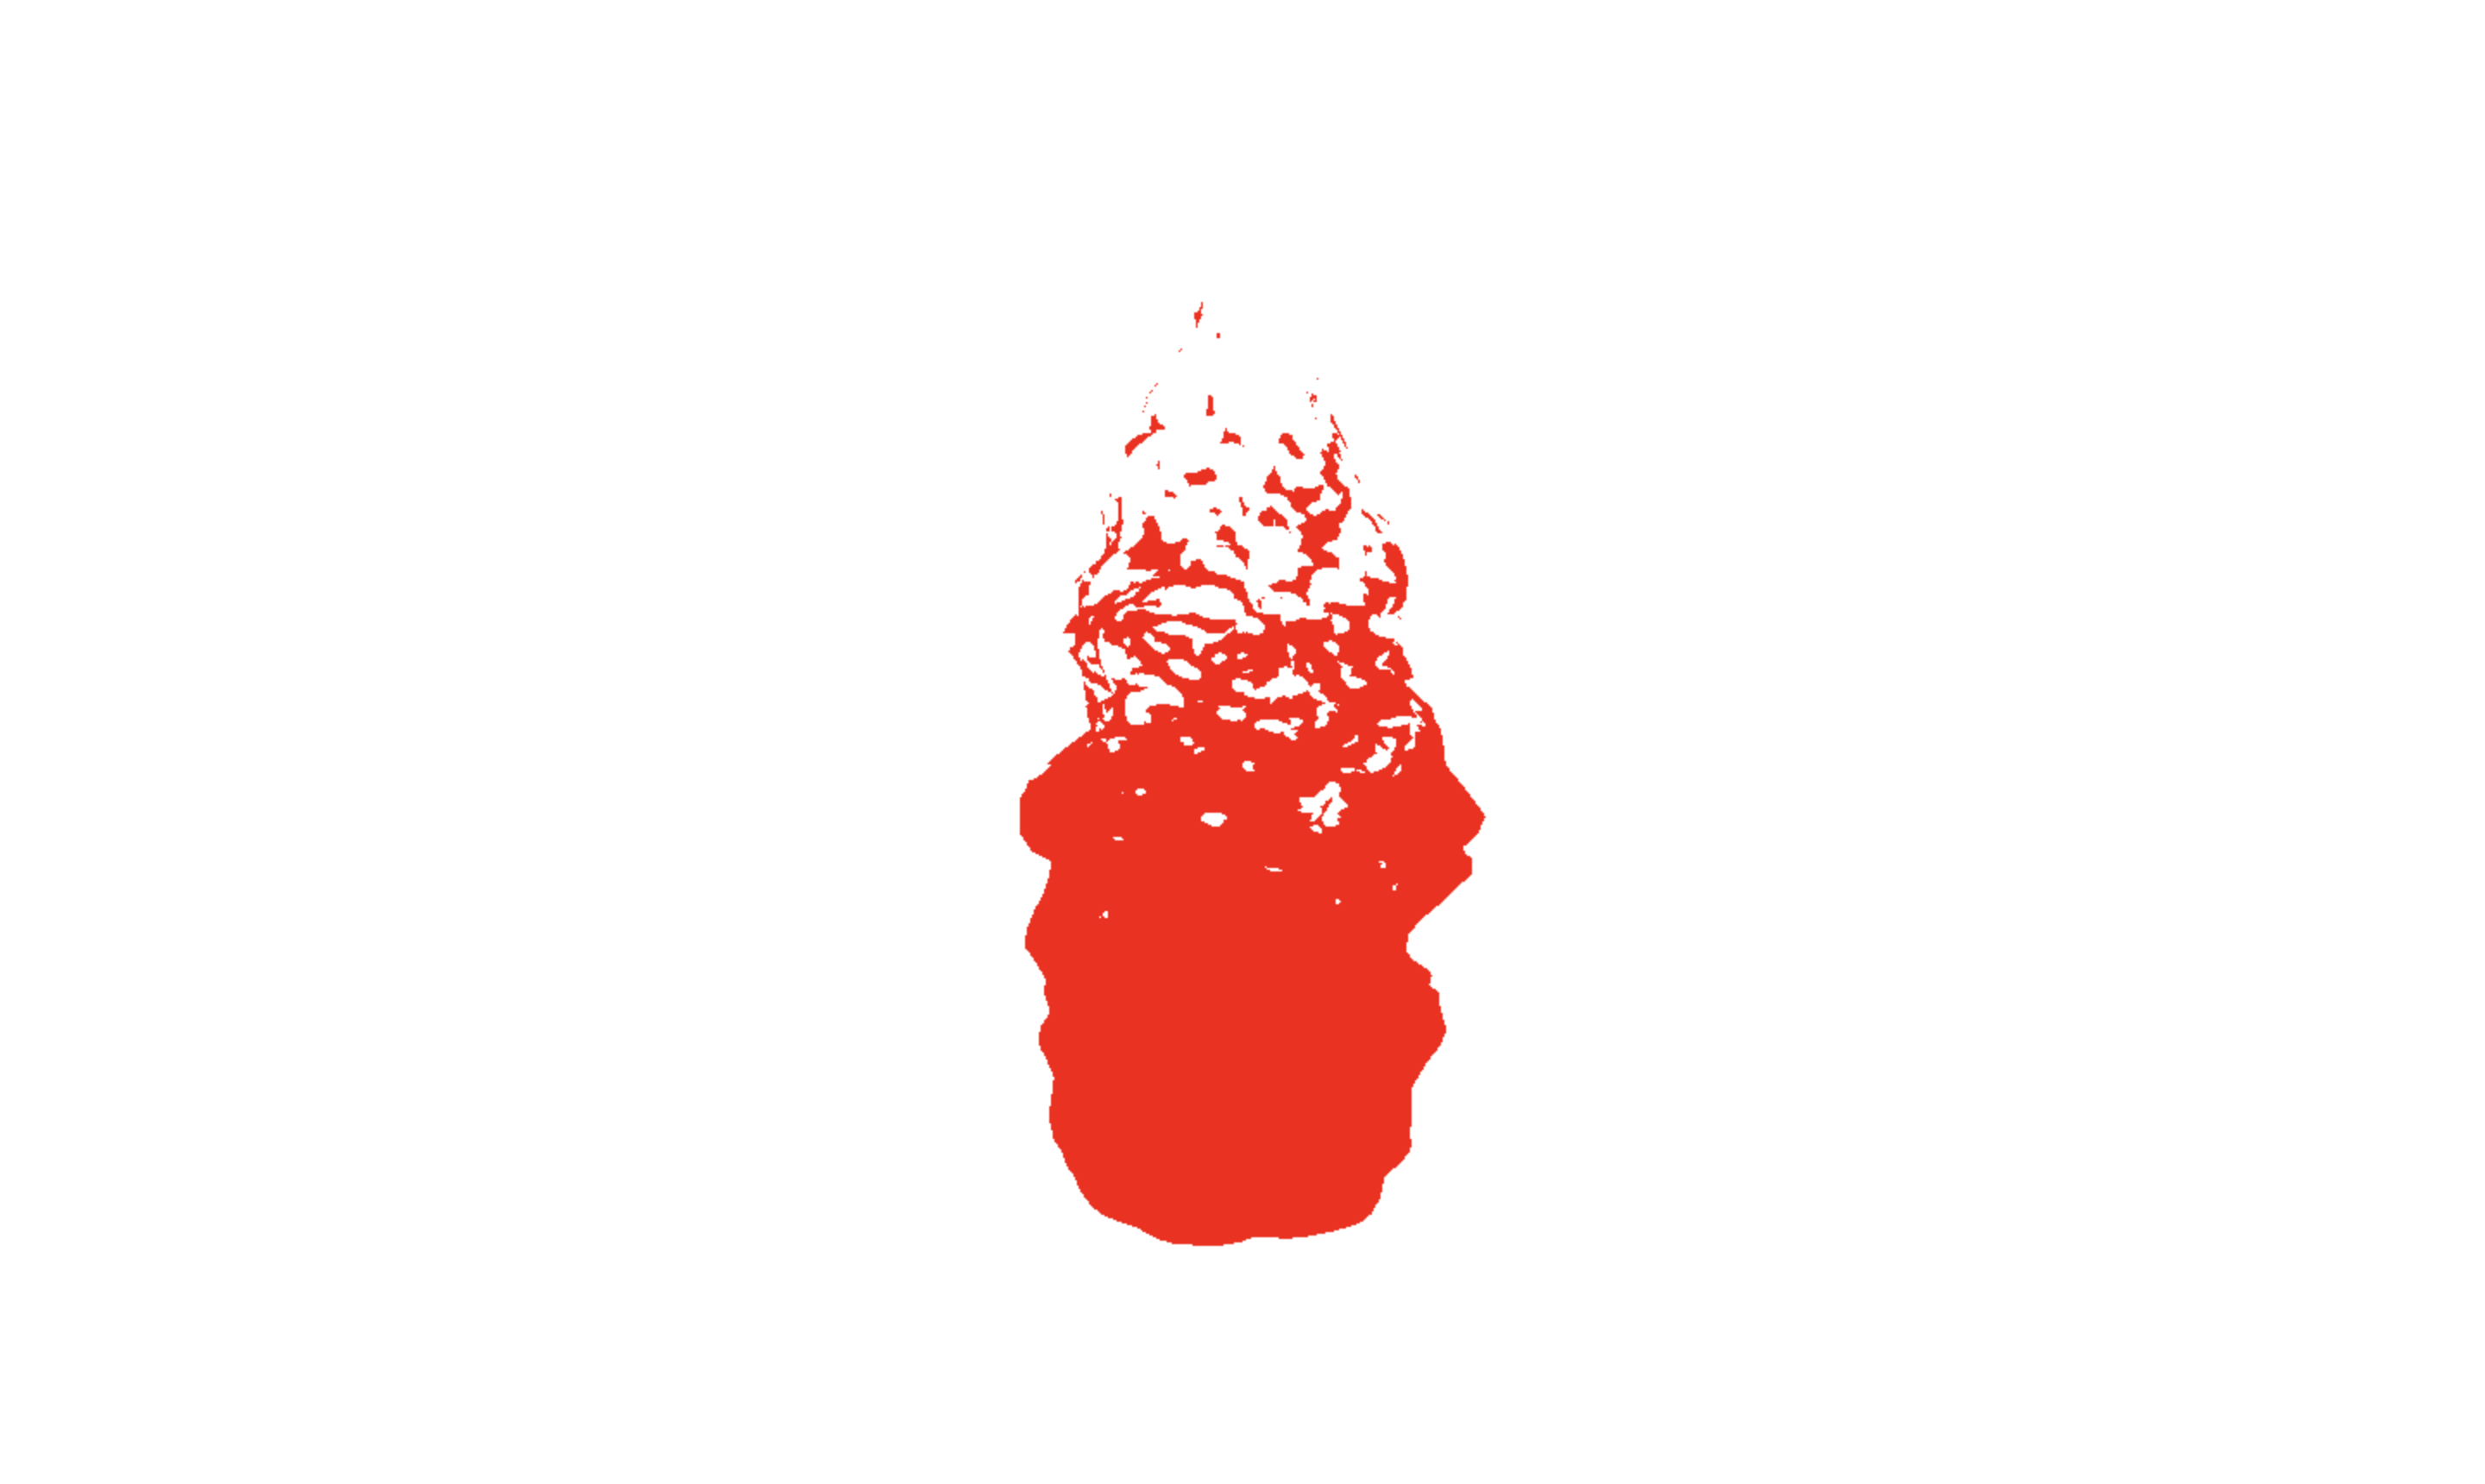
}The value vPosition.y is between -1 to 1. So, verticalGradient value will be 0 to 1 from top to bottom. -1 multiplication is for flip verticle gradient direction.
After blending, the value of the blending result will be high at the bottom because verticalGradient is also high at that point. And, the result will be low at the top.
Texture wrapping
You may notice that the rendering result doesn’t really rotate when you rotate the model. That’s because the shader computation depends on gl_FragCoord which is screen coordinate not model coordinate. So, let’s change the coordinate.
// vertex shader
//..
#define PI 3.14
//..
void main()
{
  // create coordinate that will be used for noise generation.
  vec2 coord = vec2(atan(vPosition.z, vPosition.x) / (2. * PI), vPosition.y * 0.5 + 0.5);

  // use new coordinate in noise generation
  float noise =  voronoi(coord, vec2(20.));
  float smallNoise =  voronoi(mod(coord + 0.2, 1.), vec2(30.));
  float bigNoise =  voronoi(mod(coord + 0.4, 1.), vec2(10.));

  float verticalGradient = -1. * vPosition.y * 0.5 + 0.5;
  if((noise + smallNoise + bigNoise + verticalGradient) / 4. > 0.3){
    fragColor = vec4(vec3(1), 1);
  }else{
    fragColor = vec4(vec3(0), 1);
  }
}
The new coordinate must have a horizontal value from 0 to 1 referring to the circumferential location from 0 degree to 360 degree.
So, I use atan to get the degree of the current vertex then divide it with 2 * PI. For vertical, we already have vPosition.y
whose value is between -1 to 1. So, I just normalize it with vPosition.y * 0.5 + 0.5.
Then, I put it in the noise creator function. But, To make the noise output different, I have to add an offset value and trim it to 1 with modulation.
The reason is to make the start point and end point of texture be the same point so the result will be seamless.
coordinate compare
Animate
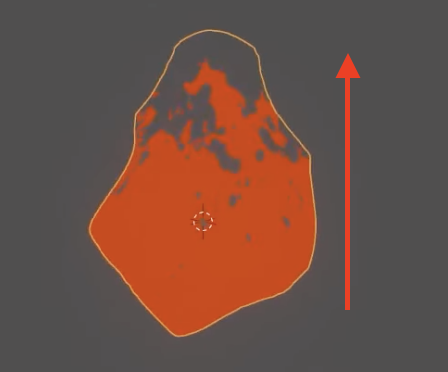
Now, it’s time for the animation. To make animation, you can just put the offset to the vertical coordinate of Voronoi noise.
So, the pattern is moved to the top.
// Main Javascript
// ...
const material = new THREE.ShaderMaterial({
  fragmentShader: fragShader,
  vertexShader: vertexShader,
  glslVersion: THREE.GLSL3,
  uniforms: { uAnimationProgress: { value: (Date.now() / 2000) % 1 } }, // add to shader via uniforms
})

function render() {
  material.uniforms.uAnimationProgress.value = (Date.now() / 2000) % 1 // keep update animation progress
  controls.update()
  renderer.render(scene, camera)
  window.requestAnimationFrame(render)
}
First, I send the animation progress as uniform to the shader. The progress value is between 0 to 1.
So, I just have to increase the progress to 1 and then reset it to 0 repeatedly to make an endless animation.
I should play animation 2 seconds a round. So, I calculate from Date.Now() divide by 2000 milisecs and then keep only a fraction part be modulation with 1.
// fragment shader
// ...
uniform float uAnimationProgress;
void main()
{
  vec2 coord = vec2(atan(vPosition.z, vPosition.x) / (2. * PI), vPosition.y * 0.5 + 0.5);

  // create animate offset for position x,y
  vec2 animateOffset = vec2(0., -uAnimationProgress);

  // add offset to vorinoi noise position arguments
  float noise =  voronoi(mod(coord + animateOffset, 1.), vec2(20.));
  float smallNoise =  voronoi(mod(coord + 0.2 + animateOffset, 1.), vec2(30.));
  float bigNoise =  voronoi(mod(coord + 0.4 + animateOffset, 1.), vec2(10.));

  float verticalGradient = -1. * vPosition.y * 0.5 + 0.5;
  if((noise + smallNoise + bigNoise + verticalGradient) / 4. > 0.3){
    fragColor = vec4(vec3(1), 1);
  }else{
    fragColor = vec4(vec3(0), 1);
  }
}
I create the offset of Voronoi noise texture by the minus of the progress value. So, as the animation plays, the vertical offset will be from 0 to -1.
The minus value offset will make Voronoi noise result coming from the below position.
animate result
Color and position
To make it more like an actual flame, I will change the color and adjust the fire pattern position to higher.
// Main Javacript
const material = new THREE.ShaderMaterial({
  fragmentShader: fragShader,
  vertexShader: vertexShader,
  glslVersion: THREE.GLSL3,
  uniforms: {
    uAnimationProgress: { value: (Date.now() / 2000) % 1 },
    uColor: { value: [1, 0, 0] }, // add color through uniform
  },
})
// fragement shader
// ...
uniform vec3 uColor;
// ...
void main()
{
vec2 coord = vec2(atan(vPosition.z, vPosition.x) / (2. * PI), vPosition.y * 0.5 + 0.5);
vec2 animateOffset = vec2(0., -uAnimationProgress);
float noise = voronoi(mod(coord + animateOffset, 1.), vec2(20.));
float smallNoise = voronoi(mod(coord + 0.2 + animateOffset, 1.), vec2(30.));
float bigNoise = voronoi(mod(coord + 0.4 + animateOffset, 1.), vec2(10.));
// acerarate gradient change rate with 1.5 multiplation
// and shift offset to top with adding 0.5
float verticalGradient = (-1. * vPosition.y * 0.5 + 0.5) * 1.3 + 0.1;
if((noise + smallNoise + bigNoise + verticalGradient) / 4. > 0.3){
fragColor = vec4(vec3(uColor), 1); // use color from uniform instead
}else{
fragColor = vec4(vec3(0), 1);
}
}I pass color through uniform and adjust the flame pattern position to higher by multiplying the gradient with 1.3 and adding 0.1.
So, now, the range of verticalGradient is -0.1 to -1.3 from top to bottom. That makes the color below the middle become higher.
And, 1.3 multiplication makes the gradient increase faster and increases the top boundary value of the gradient.
Transparency
You may already notice that the model looks opaque. So, we will make it transparent. After that, we can see the flame at the back too. You can read more about transparency in ThreeJS at Transparency in ThreeJS note. In this note, I will just give you the solution code.
// fragment shader
void main()
{
  vec2 coord = vec2(atan(vPosition.z, vPosition.x) / (2. * PI), vPosition.y * 0.5 + 0.5);
  vec2 animateOffset = vec2(0., -uAnimationProgress);
  float noise =  voronoi(mod(coord + animateOffset, 1.), vec2(20.));
  float smallNoise =  voronoi(mod(coord + 0.2 + animateOffset, 1.), vec2(30.));
  float bigNoise =  voronoi(mod(coord + 0.4 + animateOffset, 1.), vec2(10.));
  float verticalGradient = (-1. * vPosition.y * 0.5 + 0.5) * 1.3 + 0.1;
  if((noise + smallNoise + bigNoise + verticalGradient) / 4. > 0.3){
    fragColor = vec4(vec3(uColor), 1);
  }else{
    fragColor = vec4(0); // set alpha channel to be 0
  }
}
// Main Javascript
//...
const renderer = new THREE.WebGLRenderer()
renderer.setSize(width, height)
renderer.pixelRatio = window.devicePixelRatio ?? renderer.pixelRatio
renderer.autoClear = false // set auto clear canvas false
//...
const material = new THREE.ShaderMaterial({
fragmentShader: fragShader,
vertexShader: vertexShader,
glslVersion: THREE.GLSL3,
uniforms: {
uAnimationProgress: { value: (Date.now() / 2000) % 1 },
uColor: { value: [1, 0, 0] },
},
transparent: true,
})
//...
function render() {
material.uniforms.uAnimationProgress.value = (Date.now() / 2000) % 1
controls.update()
material.side = THREE.BackSide // render inside of mesh
renderer.render(scene, camera)
material.side = THREE.FrontSide // render outside of mesh
renderer.render(scene, camera)
window.requestAnimationFrame(render)
}
//...After code updating, you will get this.
Flame Distortion
Now, we will make it more swaying just like a flame being blown.
To do it, we will modify the vertex position distance from the y-axis by Voronoi noise.
// vertex shader
precision mediump float;

#define PI 3.14  // copy from fragment shader

uniform float uAnimationProgress;

out vec3 vPosition;

float random (vec2 seed) { // copy from fragment shader
  // ...
}

float voronoi(vec2 position, vec2 cellNumber){ // copy from fragment shader
  //...
}

void main()
{
    // copy from fragment shader
    vec2 coord = vec2(atan(position.z, position.x) / (2. * PI), position.y * 0.5 + 0.5);
    vec2 animateOffset = vec2(0., -uAnimationProgress);
    float noise =  voronoi(mod(coord + animateOffset, 1.), vec2(5.));
    float smallNoise =  voronoi(mod(coord + 0.2 + animateOffset, 1.), vec2(8.));
    float bigNoise =  voronoi(mod(coord + 0.4 + animateOffset, 1.), vec2(3.));

    // modify position to newPosition
    float distortionScale = (noise + smallNoise + bigNoise) / 3.;
    vec2 newHorizontalPosition = distance(position.xz, vec2(0)) * (1. - distortionScale * 0.6) * normalize(position.xz);
    vec3 newPosition = vec3(newHorizontalPosition.x, position.y, newHorizontalPosition.y);

    // use new position instead
    gl_Position = projectionMatrix * viewMatrix * modelMatrix * vec4(newPosition, 1.0);
    vPosition = position;
}
I just copied Voronoi noise logic from fragment to vertex and used them to create a distortion scale.
Then, I find the horizontal distance from the center and multiply it with the distortion scale. But, the distortion scale value is from 0 to 1,
So, I can’t use it directly unless it will be over distortion. I decrease it by multiplying 0.6. And, I minus it to 1.
So, the value is from 0.4 to 1. Then, multiply the new length to position direction (normalize(position.xz)).
Now, use it to create a new vertex position.
Distortion result
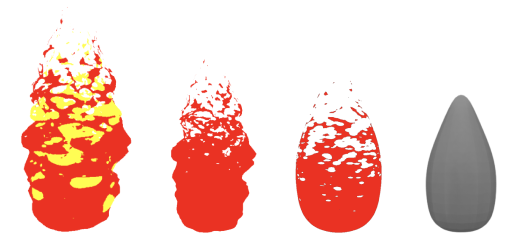
Flame layering
Now, it comes to the last step. It is to create a layer of flame to simulate the flame spectrum color.
It can be completed by creating another flame mesh inside.
// Main Javascript
// ...
const getMaterial = color =>
  new THREE.ShaderMaterial({
    fragmentShader: fragShader,
    vertexShader: vertexShader,
    glslVersion: THREE.GLSL3,
    uniforms: {
      uAnimationProgress: { value: (Date.now() / 2000) % 1 },
      uColor: { value: color },
    },
    transparent: true,
  })

const material1 = getMaterial([1, 0, 0])
const material2 = getMaterial([1, 1, 0]) // new material with yellow color
// ...
loader.load(
  '/fire-template.glb',
  function (gltf) {
    const { geometry } = gltf.scene.children[0]
    const mesh1 = new THREE.Mesh(geometry, material1)
    mesh1.position.y = -0.55

    const mesh2 = new THREE.Mesh(geometry, material2) // new mesh
    mesh2.scale.set(0.9, 0.9, 0.9) // scale it to smaller size
    mesh2.position.y = -0.55

    scene.add(mesh1)
    scene.add(mesh2)

    // move render to callback to access mesh instance
    function render() {
      material1.uniforms.uAnimationProgress.value = (Date.now() / 2000) % 1
      material2.uniforms.uAnimationProgress.value =
        (Date.now() / 2000 + 0.2) % 1
      controls.update()

      material1.side = THREE.BackSide
      material2.side = THREE.BackSide
      mesh1.renderOrder = 0
      mesh2.renderOrder = 1
      renderer.render(scene, camera)

      material2.side = THREE.FrontSide
      material1.side = THREE.FrontSide
      mesh1.renderOrder = 1
      mesh2.renderOrder = 0
      renderer.render(scene, camera)
      window.requestAnimationFrame(render)
    }

    render()
  },
  undefined,
  console.error
)
// ...
From the code, you need some adjustments on the render function location.
So, it can access mesh instances for transparency handling, read more at Transparency in ThreeJS.
And, that’s all the required steps. You can play the result in the Demo section.